This post is about building a simple DMX-USB-Interface for 2€.
Hardware
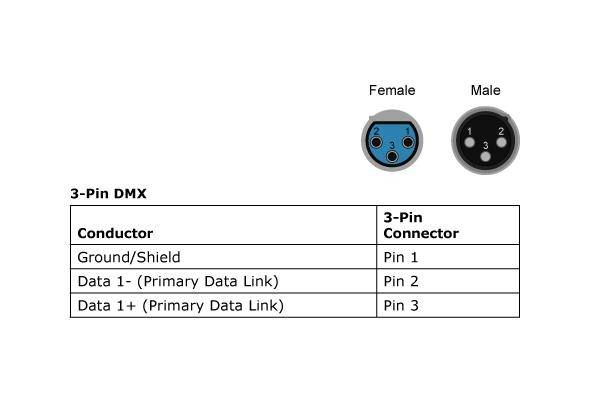
The DMX standard to control lights and other effects is based on the RS-485 standard.
All you need:
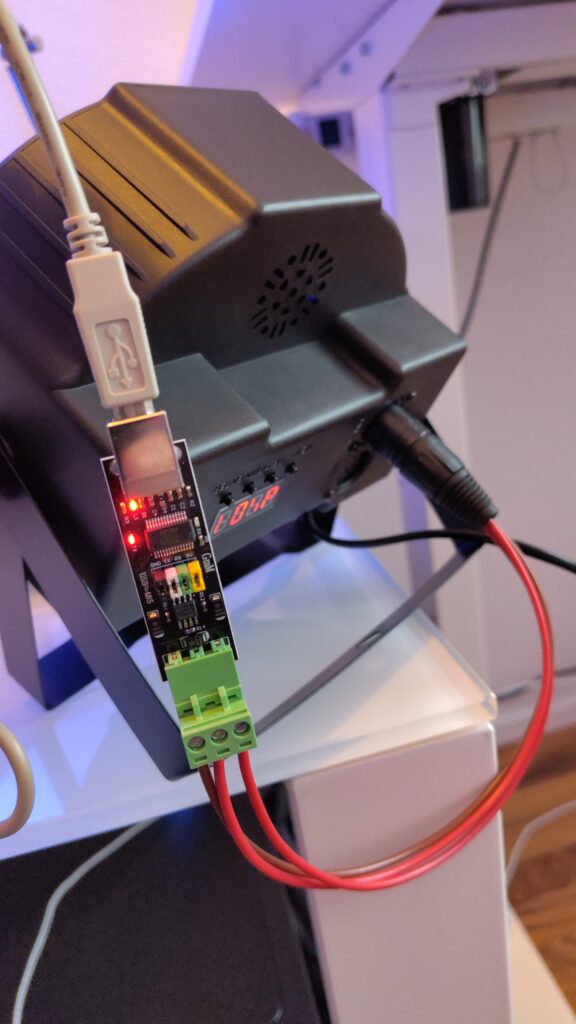
- USB to RS-485 module like the “FTDI FT232RL” module
- XLR connector female (buy a new one or reuse an old XLR cable)
- Soldering iron and a little time
Connect the 3-PINs of the XLR connector (also works with 5 PINs DMX or DMX over RJ-45) with the corresponding PINs of the RS-485 board.
Software
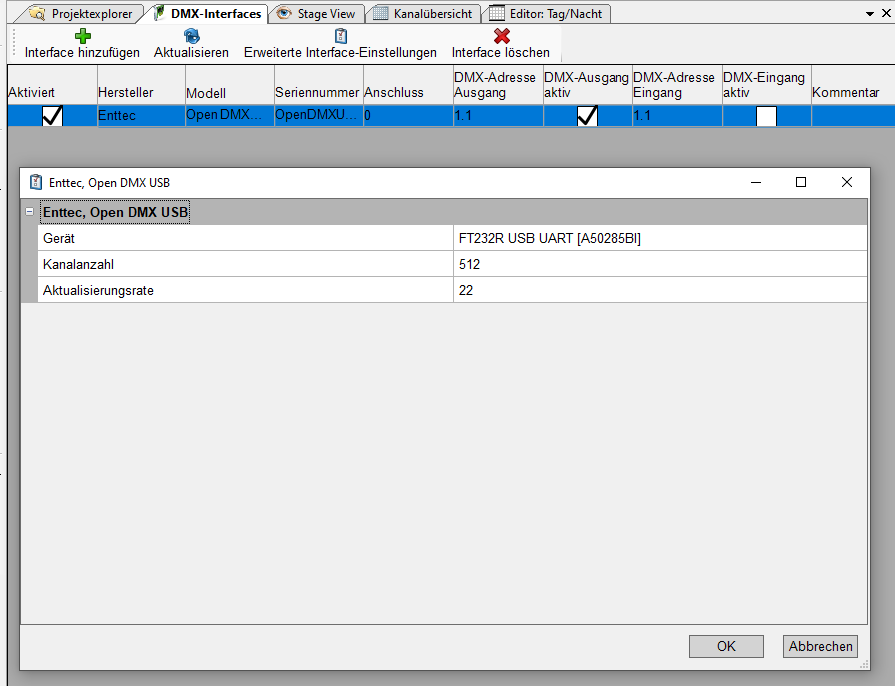
You can use any DMX software which is able to handle your device. I’m using DMX Control 3 (DMXC3) to control the lights via DMX.
Add a new interface and select “Enttec Open DMX USB”. It uses the same FTDI FT232R module.
Select your connected USB device and you’re done.
Have fun managing your DMX devices with your own but very simple USB-DMX-connector.
Hint: I would not recommend to use such self-made DMX interfaces in professional productions on stage! Recommended use-cases are decorative LED stripes at home in your party room or to control your model railway lighting system.